Setting Up G Wireless Network on Mac: A Step-by-Step Guide
Connecting to a Wi-Fi network on your Mac is a straightforward process that requires a few simple steps. However, if you're new to setting up Wi-Fi networks on your Mac, it can be a bit overwhelming. In this article, we'll guide you through the process of setting up a wireless network on your Mac, troubleshoot common issues, and manage your wireless connections efficiently.
Step 1: Ensure Your Mac's Wi-Fi is Turned On
The first step in setting up a wireless network on your Mac is to ensure that your Mac's Wi-Fi is turned on. You can do this by going to System Preferences > Network and selecting Wi-Fi. Make sure that Wi-Fi is turned on and select the network you want to connect to.
Step 2: Connect to the Wi-Fi Network
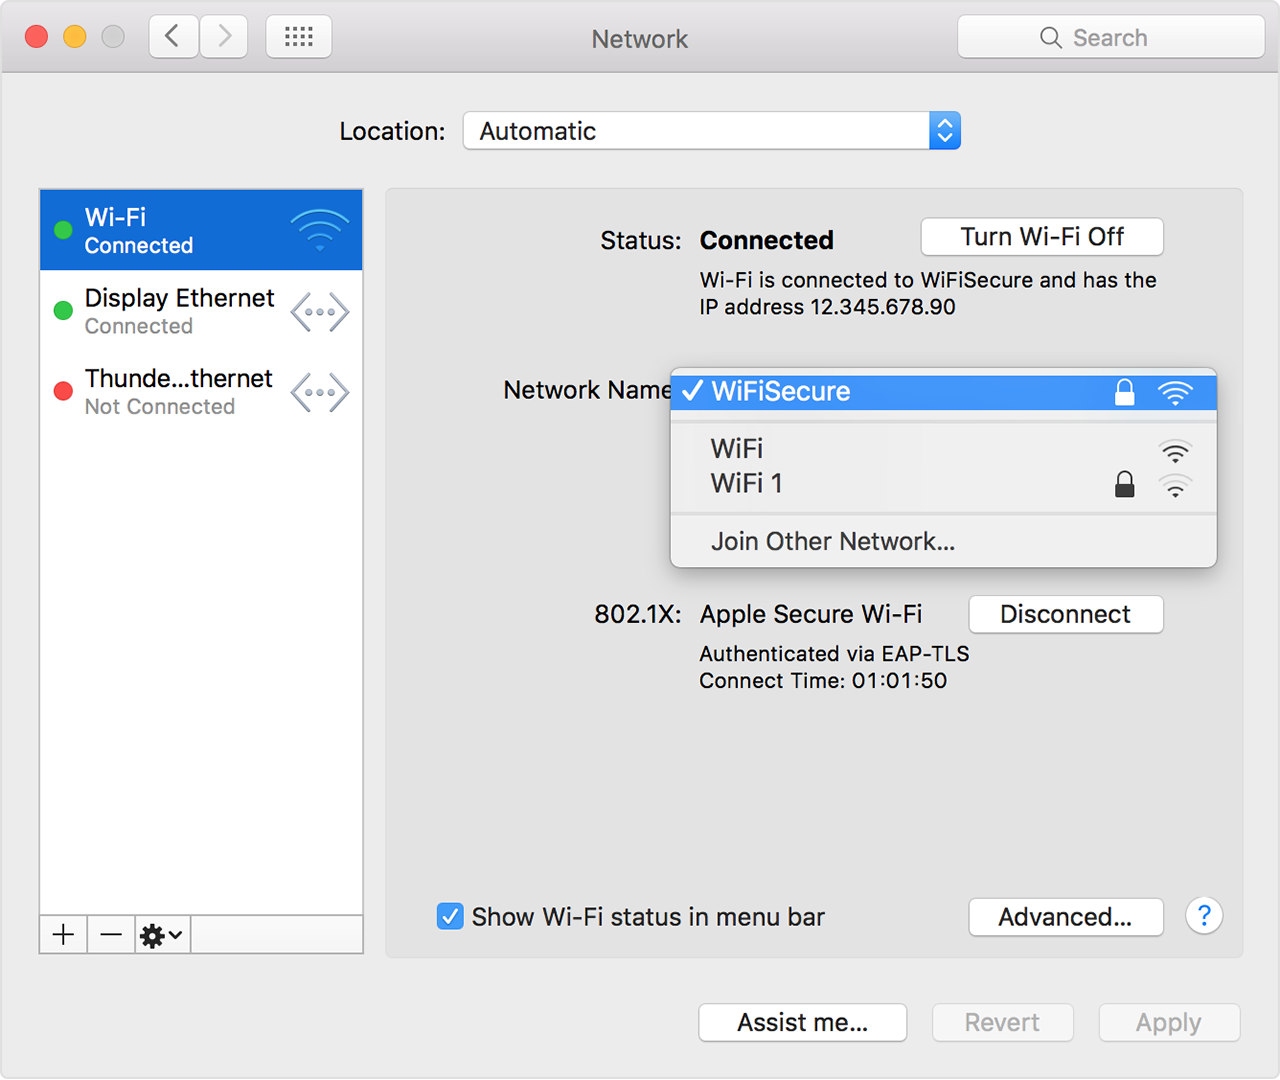
Once you've selected the Wi-Fi network you want to connect to, your Mac will automatically connect to it. If prompted, enter the network password to complete the connection process.
Step 3: Configure Your Wi-Fi Settings
After you've connected to the Wi-Fi network, you can configure your Wi-Fi settings to suit your needs. You can do this by going to System Preferences > Network and selecting the Wi-Fi network you're connected to. From here, you can customize your Wi-Fi settings, such as changing the network name or updating the Wi-Fi password.


 | HP® Support")


 - Wikipedia")


 (VIDEO)")


 | Android Studio | Android Developers")


