Setup Netgear Router As Access Point: A Step-by-Step Guide
Having a reliable and stable internet connection is essential in today's digital age. One way to achieve this is by setting up your Netgear router as an access point (AP). This mode allows your router to extend the wireless coverage of your existing network, providing a stronger and more consistent signal. In this article, we will take you through the step-by-step process of setting up your Netgear router as an access point.
Why Set Up Your Netgear Router As Access Point?
Setting up your Netgear router as an access point offers several benefits, including:
- Extended wireless coverage: By setting up your Netgear router as an access point, you can extend the wireless coverage of your network, providing a stronger and more consistent signal throughout your home or office.
- Improved network performance: Access point mode allows you to create a dedicated network for your IoT devices, laptops, and other devices that require a strong and stable connection.
- Enhanced security: By setting up your Netgear router as an access point, you can create a separate network for guests, protecting your main network from unauthorized access.
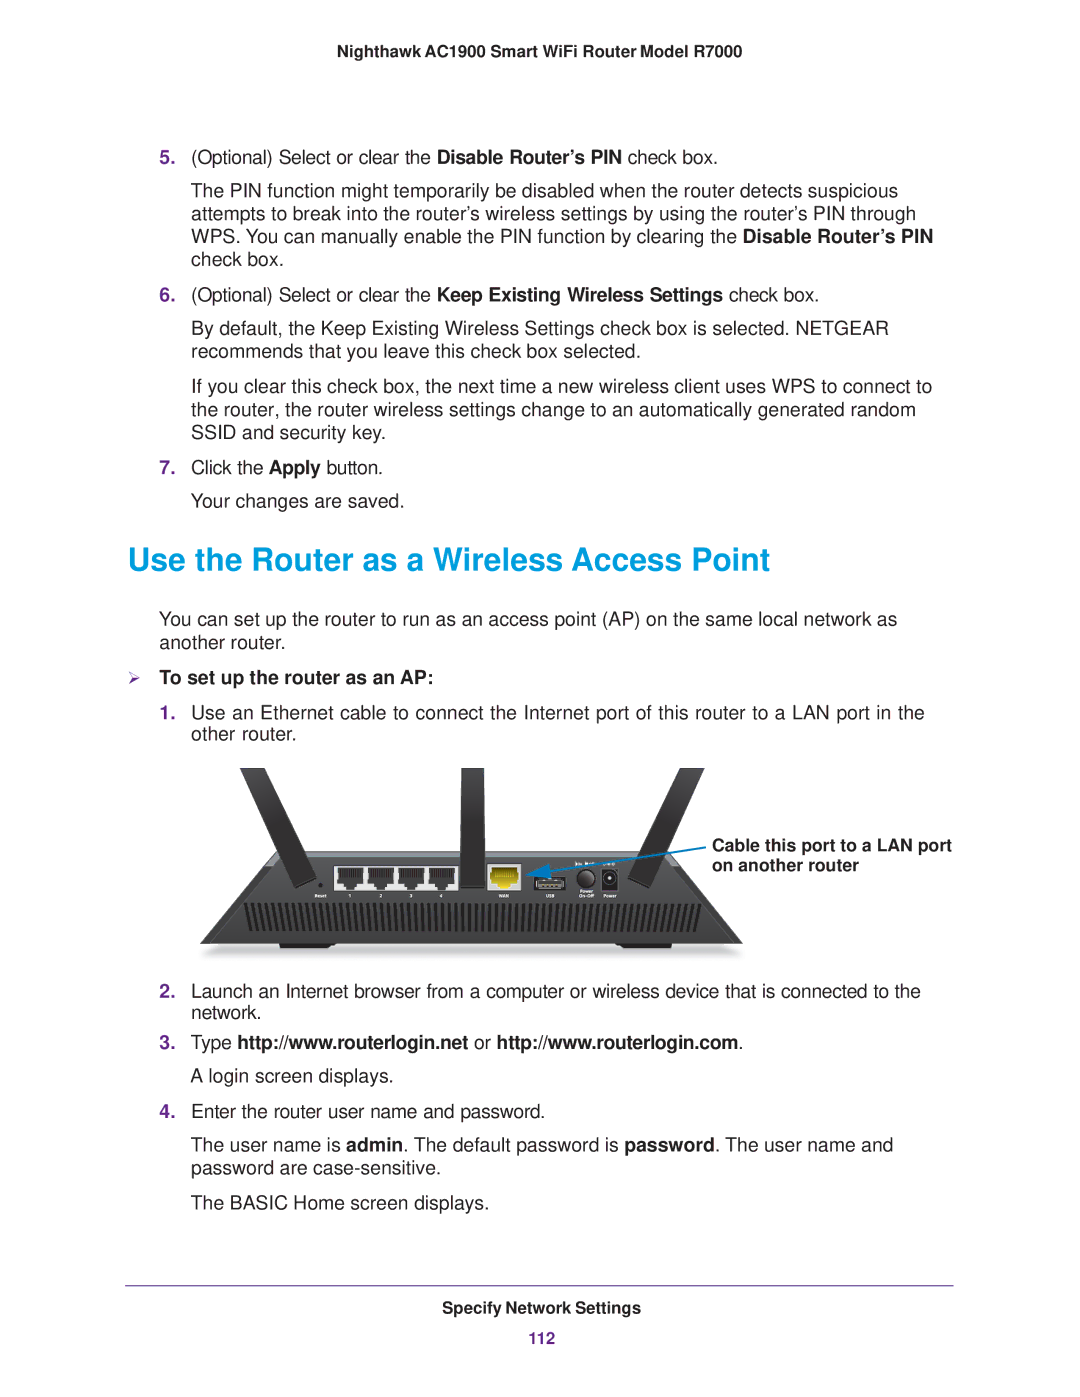
Step 1: Connect Your Computer to the Netgear Router
Before you can set up your Netgear router as an access point, you need to connect your computer to the router using an Ethernet cable. Make sure you connect your computer to one of the LAN ports on the router, not the WAN port.

 - YouTube")


 as an Access Point")


- 3x1G Ports, Easy Setup, Security ...")


:max_bytes(150000):strip_icc()/002-f6a758c952314f14aa7f26c085df7e96.jpg "NETGEAR Nighthawk 5G M7 Mobile WiFi 7 Router with eSIM ... - TweakTown")


 Portable Mini Travel Wireless Pocket VPN WiFi ...")

 - YouTube")


