Led Tape Light Installation For Decks

Exploring the Wonders of Led Tape Light Installation For Decks Through Photography

LED Tape Light Installation for Decks: A Step-by-Step Guide

Enhance Your Outdoor Space with Energy-Efficient Lighting

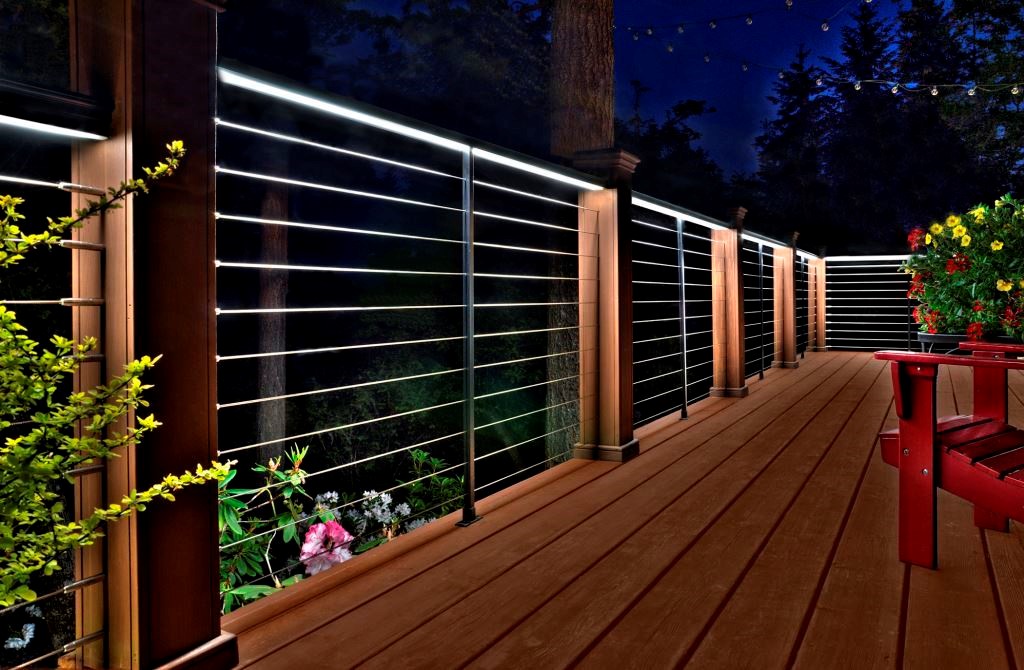
Are you looking to upgrade your deck's ambiance and safety with modern, energy-efficient lighting? Look no further than LED tape light installation for decks. In this article, we'll guide you through the process of installing LED tape lights on your deck, ensuring a seamless setup and professional finish.

Benefits of LED Tape Light Installation for Decks

Led Tape Light Installation For Decks
LED tape lights offer numerous benefits for deck owners. They are energy-efficient, durable, and easy to install. These flexible lights can be cut to fit your deck's unique shape and size, providing a customized lighting solution. Additionally, LED tape lights are weather-resistant, making them an ideal choice for outdoor use.

Materials Needed for LED Tape Light Installation for Decks

Before starting your project, gather the necessary materials: * LED tape light kit (42 LEDs per meter) * LED driver * Plug-in AC adapter * On/off switch * Wire clips * Flexible connectors * Aluminum channels (optional) * LED strip cover diffuser (optional)

Step-by-Step Guide to LED Tape Light Installation for Decks

Follow these steps to install LED tape lights on your deck: 1. **Prepare the Area**: Clear the deck of any debris or obstructions. Ensure the surface is clean and dry. 2. **Measure the Deck**: Measure the length of your deck to determine the required LED tape light length. 3. **Cut the LED Tape Light**: Cut the LED tape light only on the lines indicated, using a cutting tool specifically designed for LED tape lights. 4. **Connect the LED Tape Light**: Connect the LED tape light to the LED driver, plug in the AC adapter, and turn on the power to test the connections. 5. **Mount the LED Tape Light**: Peel off the back tape from one end and carefully place the LED tape light along the proper channel. Press the LED tape light to ensure secure contact with the surface. 6. **Secure the LED Tape Light**: Use wire clips and flexible connectors to secure the LED tape light to the deck's surface. 7. **Test the LED Tape Light**: Turn on the power and test the LED tape light to ensure it's operating properly.

Gallery Photos

Related Topics

Aluminum Siding Replacement ServicesCarpet That Looks Like HardwoodAttic Fan Installation And Energy Efficiency Upgrades For HomesLaminate Flooring Installation CostTrademark Search Database EuropeWireless Router Configuration For SpeedCarpet Cleaning Services For ApartmentsLeaky Pipe Repair And Replacement ServicesCustom Home Theater Room Installation DesignsSoft Close Drawer Cabinet ClearanceGlp 1 Receptor Downregulation And Weight GainNeurotransmitter Optimization For Improved FocusAsphalt Driveway Overlay PricesTrademark Search By Business NameInbound Lead GenerationInterior Painting For Furniture FinishesApp Landing Page Design TemplatesTrademark Search By Status Trademarkd UkCalorie Counting For Gastric Bypass Surgery Patients On Glp-1Wireless G Network Setup For Smart Water ManagementRecovery Tools For High School Football PlayersStructural Engineer For Home Units Split Space Monodomnode Metod Jp
📜 DMCA âœ‰ī¸ Contact 🔒 Privacy ÂŠī¸ Copyright